Monday 11 November 2013

Personalised Hurricanes

Hello again!

Since my order books are now open, I thought I would add a few more photos and a bit more information about my Personalised Hurricane candles.

My Hurricane wax shells, made out of high-melt temp paraffin wax. Hurricane candles are reusable and long lasting. You do not melt the wax shell itself, but a scented tealight placed inside the shell is what gets burned, so you can reuse the hurricane shell over and over again.


The inside of a Hurricane shell

I'll be making these to order, so all I'll need from the person interested in ordering is the photograph they wish me to use emailed to me at jen@welshcandlecreations.co.uk , and the scent choice for their tealight which is included in the price.  The photograph needs to be of good quality and a reasonable size to be used, so I can adjust it as required.

To give a sense of scale I've taken a photo of the sample Hurricane I've made today with some of my scented tealights.  They're of an ordinary size that you'd find anywhere, so that should give you an idea of how tall these are.


And of course I have to show the Hurricane lit, I think it looks absolutely amazing and would be a beautiful addition to anybody's home.  Remember that these do not melt while in use if used properly, and if it's summer and you're not in a candle-burning mood - why not fill it with water and use it as a flower vase?  The wax is impermeable so it won't leak or damage the hurricane.


I hope this has helped clarify a bit more about my Personalised hurricanes.  If you're interested in ordering one, either get in touch with me via the email I provided above, find me through Facebook (facebook.com/welshcandlecreations) or I'm also on Twitter (twitter.com/welshcandles.

Friday 8 November 2013

Christmas Luminaries

I'm due for another update!

I decided for this Christmas that I was going to do 4 different carving designs, embellished with a bit of bling and sparkle by including some rhinestones.  Most are tiny ones, but the ones on the Christmas Bells luminary are 3 red Swarovski rhinestone crystals which are just gorgeous.  I'm hoping to also do a range of 3 colors, including this rich red, will be deep blue and green, reminiscent of christmas baubles.

I'm generally pleased with how these have gone, though for the final 2 designs I did add too much PE22 to my white layers and it was hard to get the red & white layers separated so I'm going to have to do those ones again.  But overall I think they've gone well and I hope people will enjoy them !


Tuesday 1 October 2013

Halloween in full

After a very positive response to my mock up halloween luminary yesterday, I decided to go ahead and mix up an appropriate orange color for my pumpkin luminary today and have a real go at it.  My challenge this time around was to create 2 different layers of color for these luminaries. First layers would be in plain white to represent the inside of the "pumpkin" and create a bit of contrast.  The final layers were a nice orange pumpkin color to lend it a bit of authenticity.

Considering I'd never done a 2 tone luminary before, I'm really quite pleased with these, and reactions so far have been very positive.  I intend to make enough to take to the craft fayre with me, and then enough to be able to sell a few to family/friends and some people through FB. I hope you all enjoy these as much as I do!


Monday 30 September 2013

As Halloween approaches...

Since my first craft fayre is going to be near Halloween, I thought that it might be sort of fun to create a Halloween-themed luminary to fit the occasion.  Now I've carved plenty of pumpkins growing up in the states before moving here to the UK, and even done a few here, but I've never carved a luminary before so wasn't quite sure how to approach it.

I wanted to begin this whole idea by creating a "mock up" of what I had in mind.  I did not color the wax I used for this luminary on purpose, as I didn't want to create a lot of wax that I couldn't use for any other purpose if nobody liked the idea.  I'll choose a nice rich orange on the final product.  Anyway, I started by creating a template on paper, so I could use that to trace an outline of what I wanted to carve on the luminary itself.  Then, using my heat gun, I heated up a sharp crafting knife to carve out the luminary. I had to reheat the knife quite a lot to accomplish this.  I feel if I'd taken more time at it, I might have gotten a cleaner result, but as a starting point I thought it wasn't too bad at all.

Responses so far have been pretty positive, but still trying to get a feel as to whether people like the idea or not. So if you can, either stop by my Facebook page or the Craft Forum where I've also posted, to give me feedback on what you think!


Tuesday 24 September 2013

On to another design

My goal for my hurricanes this season was to come up with 2 season representative designs for my hurricane candles, that people could look at and say "Yeah, that's Autumn!".  I think I've accomplished that in the two I've done recently.  The previous blog post I did shows the orange/cinnamon/star anise hurricanes I was doing before and succeeded with, and this one I'll focus on the autumn leaves hurricane I've created in the past two days.

The first one I did yesterday was the first I'd tried with real autumn leaves, and you better believe they were VERY contrary, they just would not stay where I wanted them to.  I did my best getting them to stay and gave it a go.  Needless to say it wasn't 100% what I had in mind, I was frustrated that the leaves weren't as close to the front as I'd hoped. But when lit up it looked amazing, loads of layers which showed up really well.


However I got spectacular response to that particular hurricane, so much so that I decided to have another go at it today. This time I took far more time getting the leaves "just so", and have them stay in place.  I am so pleased with this particular one, the colors are wonderful and it glows really well while lit. I hope you all enjoy it as much as I do!


My next plan now is to make a few more of these for stock to sell at the Sparkle charity craft fayre which will be in Cwmbran on Oct 26th, where I'll finally be selling!  I hope if you're in the area of Cwmbran here in Wales, that you'll stop by and see my work in person :)


Wednesday 18 September 2013

Repeatable results

So today I attempted to replicate the success I had with my hurricane from last week.  I went through the same process, improving my method of placing the mold into the water bath with a bit of messy DIY.  And I managed to come up with the same results I had last week, which is fantastic news!  No two hurricanes will ever look the same, and I'm quite pleased with these.

My next hurricane should have some autumn leaves in them, we'll see how that adventure goes!

A photo of the hurricane from today

A photo of the two side by side, 1st attempt on the left, newest one on the right.


Tuesday 17 September 2013

More luminaries!

Finally made a start on stock to sell, and sticking to my autumn theme at the moment.  I'm pretty happy with these for the most part, apart from the ivy leaves one, I feel like it needs a 3rd leaf, and maybe a stem for the one missing a stem. Other than that I'm rather pleased with these.  These will be for sale very soon!


Success!!

After much trial and error, I finally have completed a hurricane that I'd be happy to sell to anyone - finally!  Been using the same method I've brought up a few times in previous posts, and I used Oranges, Cinnamon Sticks, and Star-anise in this one.  This one, along with others, will be available for sale soon!


Wednesday 11 September 2013

Another hurricane, still not quite a success.

Another day, and another trial to get these hurricanes right.  I love embedding things in these hurricanes, I just wish that I could see further into the wax!  If I could get my hands on that transparency additive they sell in the US I'd be so happy, but thus far unable to find someone here who sells it.

Anyway, with this particular hurricane, I tried yet another method of embedding, which was to pour the wax into the mold, place it into the water bath, and as quickly as I can (using long tweesers) placing the items into the wax directly as soon as a wall started to form. Sadly I didn't move fast enough (or this method just won't work) as the items I placed were not close enough to the surface to show properly.

Now don't get me wrong, I like that the end result is this nice, clean hurricane that's hiding all these things underneath, so  you can only see it properly once it's lit. But I don't know if it's autumnal enough, or quite what I had in mind.  More practice needed :(


Monday 9 September 2013

Back in the saddle

Hey everyone!

Haven't fallen off the face of the earth, in fact I only moved locations on the face of the earth for 3 weeks, I headed back to the US to visit my family over there.  Had a really great time, but it's taken me a bit to get organised and now I'm set to take on candlemaking once again.

I started off today by making a start on getting stock together in prep for selling, mainly sticking to the autumnal theme at the moment, though will also be making christmassy things in the background all set for christmas.  My plan as it stands right now is to make a good number of autumnal luminaries, seasonal tealights to go with them, a good two dozen scented candles in two different sizes, also in seasonal scents, and I'm also going to be tackling some autumnal & christmassy hurricanes.  I'm so excited!

Anyway here's the 4 I started with today, they're not too bad if I do say so myself. However, I can't decide of the leaves I put on these are too big? Haven't had much feedback yet.


And that's basically it for now, will make another post when I got more to share :)

Wednesday 19 June 2013

New Hurricane candle, new foibles and problems...

Finally had a chance to make another hurricane candle today, I was pretty excited to try a new technique I'd read about using tissue paper in a candle.

Yesterday I cut a piece of tissue paper to size and used hot glue to stick the flowers to the tissue, creating the scene I wanted to have on the candle in advance so I'd be all ready for today.  Everything went really well as the tissue placed and fit into the mold nicely and seemed to hold shape prior to pouring the wax.

However the end result was not as expected as the tissue had curled in on itself where the ends were to meet, taking the flowers away from the front of the mold like i wanted and setting them further into the wax.  Also in parts it seemed to not allow the wax into the front of the tissue, so the flowers are exposed which is not what I wanted either.  There's also air pockets in the wax creating bubbles, and the tissue paper has rippled under the surface of the wax creating a frustratingly ugly texture to the wax.

I think I made an error in technique and should've put the wax into the mold first (and definitely need to have a hot mold, that helps a lot, which I didn't do this time), and then place the tissue into the wax that way. A bit disappointed to be honest, but shows that using this technique has the potential to look the way I want it to, I just need to correct my errors.


This photo shows how the paper curled under, and took the 
flowers into the wax and away from the surface. Also created a dip in
the wax on the surface which is not what I wanted.

And a photo of it lit, best I can considering it's still daylight.

More practice needed with this technique!

Sunday 16 June 2013

Logos and Labels & Lo's, oh my!

It's definitely been a big roller coaster trying to come up with an appealing logo to represent my company, I've been trying these many months to come up with the ideal image that was unique to me.  After many trials and tribulations I think I'm finally happy with how it looks!

I've also finished the design for the labels I'll be using on my scented jars, which was a major trial as well.  At the moment I've an 8oz jar and a 4oz jar in mind for my candles, I may do a 3rd size that'll be larger than the 8 but I haven't found it yet.

The final designs I need to accomplish is back labels for the jars, and labels for the luminaries & hurricanes which I haven't started yet.  Also need to start contemplating packaging :)
My final logo design


Final label designs for the 3 scents I've chosen so far, Apple Strudel from CandleShack


Final design Asian Pear & Plum from Scent Perfique


Final design Wild Berries from Sensory Perfection

I'll be testing my jars very soon, more to come, watch this space! 


Wednesday 5 June 2013

I'm back and ready to go!

After two weeks away and a few days to let the post-holiday fog clear, I'm back and ready to get back to it.  I started off today by attempting to make another hurricane candle.  To see the process I followed, see my post regarding my first hurricane candle attempt here.

I did very little different to the original process, the only difference being that I used wild flowers & the hurricane mold insert to keep the flowers in place while the wax set.  Overall I'm reasonably pleased with the results, though I think maybe using more flowers might've been nice, placing the flowers lower in the mold so they weren't so close to the top of the hurricane, and perhaps not to fill the mold up quite so high. Other than that, not bad at all!

The process for using the insert is as follows:

1) place the insert into the middle of the hurricane mold.

2) insert the flowers between the insert & the hurricane mold. I needed to take more care with this process so will remember that next time. Also make sure that your items you're placing aren't too close to the top of the hurricane ( like mine are, oops ) as this makes it difficult to keep the flowers in the wax. Don't want these flowers sticking out of the top and becoming a fire hazard.

3) pour the hot melted wax into the insert tube (NOT the hurricane mold directly, it's too small a gap and you don't want to move your flowers about). Make sure the wax covers the stuff you've placed inside.

I added a luminary candle & a tealight candle in the photo to represent the size of the hurricane, as I got a few criticisms that the size of the hurricane was hard to judge in a photo.

I'll keep this one around for a bit longer, then remelt it and try again. Watch this space!

Thursday 16 May 2013

And we're off!

Just to let all know that I won't have dropped off the face of the earth, but have been packing as the family and I are going to be off on a holiday and won't be back for a while.  But stay tuned as I'll be back in full swing very soon!  In the meantime, I think I'm getting close to the look I'm after for my business cards and for my logo. Any thoughts, feel free to share :) Everyone have a great Whitsun and will be back soon!


Tuesday 7 May 2013

First attempt at hurricane candles

I finally had a bit of time to get back to testing and experimenting, so I decided to break out my new hurricane mold and give making a photo hurricane candle a try.  There were a few complications with this, 1) I've never attempted to make a hurricane candle before 2) never embedded a photo in a candle before and 3) never used a water bath before.  So this was going to be fraught with new techniques to try, and I knew that it might not go according to plan.

I chose not to use PE22 this first time just to see if it was even going to be required, I wouldn't want an expense that I don't really need.

Ok so here's the process I followed:

  • I pinched a bucket from my OH and marked out where I needed to fill the water to, so that when I put in the mold the water would come up to just over the top of the level of melted wax in the mold.  I marked these on the bucket itself so I wouldn't have to do it again.  
  • Then I weighed out the amount of wax I needed (nearly 2kg of wax!) and started that melting away on my double boiler.
  • I took my hurricane mold (I decided to do without the insert this time as I only wanted to use a photo) and put cooking spray on the inside of the mold just to ease the release of the candle from the mold, wiping it so there was only a residue left over.
  • As the wax was nearly all melted, I took a wooden spatula (slice?) and placed that in my melting wax so I could have a warm spatula to hold the photo on the side of the mold. If I had used a cold spatula the photo would've stuck to the spatula rather than the side of the mold.
  • I placed the hurricane mold in the oven as it was pretty cold (not sure if this is necessary, I'll be testing this further).
  • Once the wax reached about 190F I poured the wax into the heated mold, leaving about half an inch gap from the top just to reduce chances of getting water into the wax.
  • I then placed the mold in the water bath, weighting it down as it would float otherwise.
  • I then waited for the walls of the hurricane to form. I was aiming for about half an inch but I overshot this a bit, so will have to keep a better eye on it next time.  Then I cut the "lid" or film of wax that had formed in the center of the hurricane candle, and poured the still melted wax back into the pouring jug, leaving it tipped straight down just to run out the remainder of the wax so it wouldn't pool at the bottom creating puddles. I didn't leave it long enough so ended up with a puddle or two.
  • I placed my hurricane in the freezer just to speed it's cooling along, I don't really think that's necessary but I was impatient :)  Came out smooth and shiny, just how I was hoping for, but the top was a mess.  The inside was also sludgy, not 100% sure why so more experimenting needed.  I heated up a baking tray and placed the hurricane top down on the tray to melt & even up the top rim, then used a hot spoon to smooth the rim where it had become uneven. with more practice I think I'll be able to speed up this process and not need to do so much touch-up.

sludgy inside, with a puddle or two.

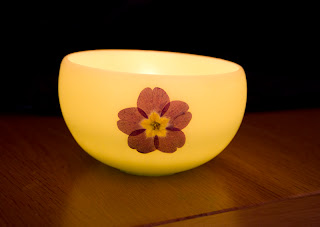
And this is the final product!

 Final product lit, best I can as it's still daylight.

Overall I think I'm reasonably pleased.  Conclusions are this 1) I need to use the PE22 to reduce the interior cracking. 2) Need to improve my ability to move the mold from being filled, into the waterbath.  Any suggestions for creating a wire harness or anything that would be useful would be gratefully received. 3) I also need to keep a sharp eye on it so it doesn't get so thick. More to come, watch this space!


Saturday 4 May 2013

More luminaries

A bit of another update, just to post my most recent efforts.  A friend of a friend requested 2 cream luminaries and I suggested that I'd picked and pressed some wild violets that I could try. She agreed, way hey :)

Lucky I'd ordered and received more wax as I was definitely running a bit low.  I followed the usual techniques that I've laid out earlier in the blog, and was reasonably pleased at how nice they came out, reasonably uniform in shape. Just differing a bit on size really.  The violets were pretty easy to embed into the wax and I have to say they look really great against these cream luminaries.

Just as a bit of a sidenote, if anyone is concerned about using water balloons (which I obviously have to burst to get the luminary free), these water balloons are biodegradable.

Here they are cooling and setting.

Here they are set up with their matching tealights, 3 are apple strudel and spice scented from Candleshack (can you tell I like this scent?) and Asian Pear & Plum from Scent Perfique, which compliments the apple really well.

And finally showing off my favorite of the bunch, which I gifted to my MIL.

Still getting a few things together before I can attempt the hurricane candle mold that I've got, but soon as I get my act together, I'll be showing some of my efforts for those. Watch this space! :)


Tuesday 30 April 2013

Handmade design quest continues

Still plugging away at coming up with design for my company logo, business cards etc.  It's a hard job and I'm definitely not qualified to come up with something stylish and professional. But as I've 0 funds at all to pay anyone for it, I'll keep chipping at it and hopefully come up with an acceptable start.

I think I've got the direction I want my logo to go in, after much deliberation.  It needs more work to really make it stand out, maybe a hand-drawn welsh dragon? Anyway it's a start.


I've also been working on a business card, another thing I can't pay anybody for, unless I can find a free offer somewhere...though those always seem to be hiding shipping charges!  Since I've an idea for a logo, that makes the card so much easier!  Not sure how the reverse of the card will look, but the front is going in this direction:


Obviously more work is definitely required!


Monday 29 April 2013

While I'm waiting, more scented soy candles!

I decided while I was waiting for my paraffin wax to arrive, to have another go with making some soy votive container candles & experiment with another scent - Patchouli Nutmeg & Ginger from Scent Perfique.

I followed my usual technique I'd adjusted to recently, heating to 80C, adding scent & 70 and then pouring at 65.  This time I didn't use any color dye as I couldn't decide what would be a suitable color for this fragrance...and thought perhaps a classic uncolored candle would suit the scent very well.  I think I chose correctly but we'll see how it goes.

I've got 2 different wicks in these, one is CSN -16 from 4candles, the other is TB-14 from Candleshack.

Lots more still to come, watch this space!

Due for another luminary update!

OK so here it is, another update on my luminary journey.  I've done 3 lots of luminaries since I finished the last batch.  My MIL has received her 12 luminaries that she asked for as gifts, and I've also finished making the ones for others who requested them. Making a grand total of 16!

These are the neutral cream ones I made, matching tealights of a similar color, scented with Apple Strudel & spice.  I think these were my favorite :)

The controversial purple/pink color! Many seemed to like it with the minority (including myself) not caring for the color.  Matching tealights scented with Black Pomegranate - I think I've decided that I don't care for the scent so won't be using it again.

And the final lot, also a bit controversial in it's way. Many seemed to prefer the flowers to be more prominent where others were happier with them blending in like they do here.  But I really love the deep red color I got with these, and the matching Wild Berry tealights (2 were actually Orange & Cinnamon as requested).


I've no more requests for these so I've ordered more paraffin wax and I'm now going to be experimenting with my new hurricane mold. These will be so much more customisable and I think they'll do very well. I can't wait to share my experiences with these!

Thursday 18 April 2013

Luminary journey of learning continues

All right, overdue for a bit of an update.  I've done 2 lots of luminaries since I did the last update, and overall I've been pretty pleased with them.  My current dilemma is that my 15cm porridger pot just isn't wide enough for the size and thickness of the luminaries that I want to do, so I kept getting lumpy sides where I touched the sides of the pot with the balloon. Frustrating!  These are the photos from the first lot since the last update, I adore their sunshine-like color, not thrilled about my attempt to embed this time though as I placed it too low on the luminary itself.  Otherwise I think they don't look too bad aside from that lumpy texture I was talking about.

This is a photo of the two of them cooling and setting on the balloons.


So for my 2nd lot of luminaries I decided to have a go at making smaller ones, thus avoiding the sides of the pot.  Problem is I will now have to test these to see if they're TOO small and thus unsafe to use.  They however are very lovely and have a nice smooth finish to them...other than the one with the forget-me-not flowers on the far right as I didn't dip the final coat fast enough and got too thick of a layer of wax over the flowers, and I also got too low on the amount of wax I had for dipping - annoying!  I will definitely have to invest in a deeper pot.  But the other two I'm very pleased with!

Here they are setting and cooling


 Final product

My deep pot should be showing up in the next day or two so watch this space and see how I get on with it.

***edited to add***

Photos of one lit :)